Welcome to my collection of 1:12 scale miniature food made with love (and polymer clay) - for dollhouses or admirers of all-things-mini.

In life, it's the small things around you that matter the most. Embrace, enjoy, and savor every second with all your might.

Showing posts with label polymer clay miniatures. Show all posts

Sunday, April 21, 2013

Croquet Anyone?

I'm listening to the sounds of spring outside, birds are chirping, the sun is shining. Ah what lovely weather. And as soon as the temperature creeps up into the 70s and stays there a bit, I might be able to get out and enjoy some sunshine. My fingers and toes really suffer in cold and brisk weather and I can barely move them when it's cold. We had a run of 80 + degree temperatures a week or so ago, but sadly, those temperatures went straight back down into the 50s and 60s again. My joints definitely are not amused. 

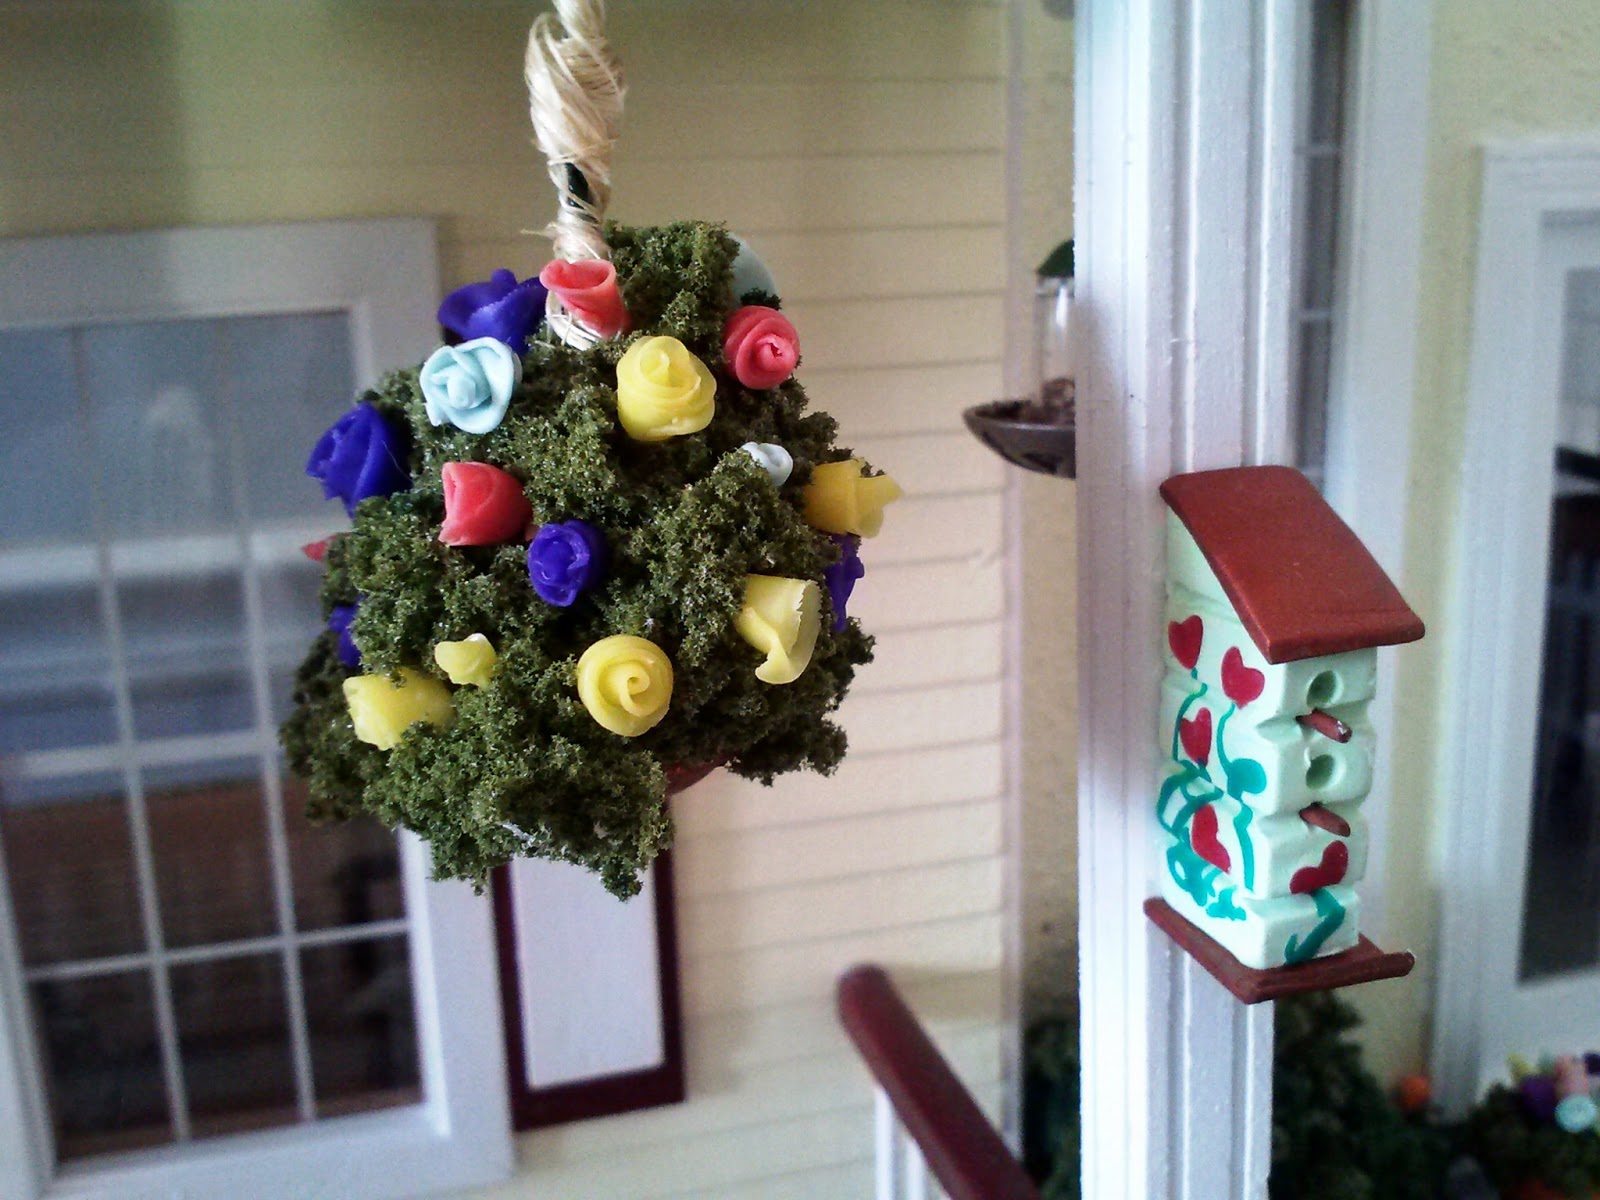
But the promise of warmer days ahead has definitely inspired some new exterior work...would you believe we glued together this darling little croquet set from bits of scrap wood we had lying around, and some paper clips and polymer clay? And since my hands are limited to what they can do with tools like hand drills or mini saws, making a miniature birdhouse out of wood was out of the question. So I tried another medium - polymer clay! It might not look as realistic as a wooden birdhouse, but it sure was easier on my hands to make these little cuties. 

Click on the pictures to supersize. And thanks so much for following along! Please feel free to leave a comment at the end - I love comments, and try to respond back to everyone! :) Many mini hugs to all!!


Sunday, April 14, 2013

Mixing it Up Some More

Hi everyone! It's finally starting to look like spring here in the U.S. Not only did we add a fabulous little mixer to our growing collection (it was white, but I painted it a fabulous bright orange), but there's lots of landscaping going on at the Vermont farm house. Pictures are worth a thousand words, so I just had to share. :)

Mixers mixers everywhere! We added the orange mixer, and, I found a darling unique antique looking hand crank mixer on eBay! See that red one in the back? A word about the orange mixer - this one is 1 1/4 inch tall, as compared to the ones that look exactly like this model, but are only 1 inch tall. I think the 1 1/4 inch tall mixers are much closer to 1:12 scale, so we're going to stick with those from now on.

Click on the pics to enlarge for detail. :)


And the tiny hand crank on the red one really turns the paddles! Awesome!!


The landscaping and the two-story and conservatory additions make this look like one heck of a hot property in Dollhouseville! :D Real Good Toys makes amazing dollhouse kits! And they're so simple to put together. The flowers in the flower boxes at the top windows are tiny flowers we stripped from larger silk flower bouquets and glued onto the boxes. The hanging baskets and the wreath on the door are made from polymer clay roses and seashells, glued onto clumps of Woodland Scenics artificial grass.


The fence is nothing more than balsa wood and craft sticks glued together and painted white. :) The gate works because we put 2 tiny hinges on it. You can find packs of these tiny brass hinges at Michael's Crafts.


The sidewalk is made from Premo granite polymer clay and Woodland Scenics white sand for filler. The tiny white stones that frame the sidewalk are also made from polymer clay - white granite Premo. All the little flowers tucked into the Woodland Scenics grass along the borders are made from polymer clay too.


What's a front door without a welcome mat? :) Thanks to Joanne's Minis amazing blog this door mat was a breeze! I modified it a little by using paint pens instead of rubber stamps, but the effect is almost as good. She makes amazing tutorials and uses really clever ideas to make awesome dollhouse minis. Check out her blog! The step by step videos are very cool.


The pots for the flowers are made from polymer clay too - Premo sweet potato color. ;)


One of my friends suggested we needed a bird feeder. I whipped this one up using a dollhouse drinking glass, odds and ends from leftover jewelry findings, and sprinkled some poppy seeds, sand, and crushed spices from the spice cabinet in our kitchen into the bowl of the bird feeder. Does it look like bird seed? Close enough?

Wind chimes! Nothing more than old jewelry beads and findings, and wire. :)


The bird bath is made from one of the same old jewelry findings we used for the bird feeder bowl. The post is made from some old scrap wood shapes, and spray painted white. Of course, our dollhouse birds are a little messy, they left little bits of bird seed and dirt behind. The water is hardened Triple Thick Gloss.

Polymer clay rocks, Woodland Scenics grass, and some hardened Triple Thick, and now we have a pond! With tiny orange polymer clay goldfish swimming around! :D

Future site of a raised bed vegetable garden - that will take a while to create. 


A happy home! 

Thanks so much for stopping by. :) I love reading your wonderful comments. Have a fantastic weekend everyone, and enjoy the weather if it's spring wherever you are.

Saturday, February 9, 2013

Finally Completed the Christmas Projects!

Where does time go? Sometimes I'm not even aware of the days and how they pass so quickly. I'm only able to get a small amount of tasks done, nothing compared to what I used to. There was a time where I was punctual, when I got projects and deadlines completed on time, or even early! But alas my health (or lack thereof) gets in the way more and more. Lupus is a nasty thing, sometimes it's like having the flu for weeks and weeks without end. It inflicts mind numbing aches and swelling in my hands, feet, toes, knees, practically every joint I need to bend and function. But I made a commitment to myself a long time ago to complete these gifts, and complete them I did. Working on them a little bit at a time, 30 minutes here, 15 minutes there...and about a month and a half late, way past the holiday, they're done....but better late than never, eh? And now I've cleaned my work space of all the holiday stuff and can tackle a few new projects and get a piece ready for my first giveaway for all my terrific followers! Stay tuned for more info on the giveaway. And thank you soooooo much for reading and following my blog!

Click on the pics to enlarge...

The final 3 Christmas Stove ornaments. 
One for a friend who used to have an adorable Westie named Sydney. 
It looks just like her! Thanks to Manor House Miniatures I was able to purchase this wonderful little resin replica. The glue under her little feet wasn't quite dry yet when I took this photo.


Always something good baking in the oven. :)
For another friend who loves organic and fresh food!


Raspberry pie in this darling oven. 

Lots of cakes and cookies baking here!
I love chocolate bundt cake!


A yellow bundt cake fresh from the oven.

Crusty French loaf.

A cozy Christmas fireplace ornament for a friend with a very large family. :)
This miniature Nativity scene came from Manor House Miniatures. So unique!
I was dying to try this xylophone project that I saw on a fellow blogger's tutorial list, many thanks and a big shout out to Joanne's Minis for providing such a terrific tutorial! It was so easy to follow the directions in Joanne's very well made and detailed video.
I enhanced the miniature dollhouse I got at Manor House Miniatures by adding tiny shingles for a more realistic effect. 


The tiny train came from Hobby Lobby. So cute!
Fresh baked cookies, and toasted marshmallows, graham crackers, and chocolate bars for S'mores!


A mini stove and cupboard ornament, for a very dear friend who helps me a lot with driving, errands, and just being there to listen when the going gets tough. :)


And one final old fashioned stove for another dear friend who helps me so much!


Thank you so much for visiting my blog! <3 <3 Many mini hugs to all! :D